

Now, this is no means a definitive guide, but this is simply MY way of crocheting bobble beanies for my boys. (I cannot resist alliteration, sorry about that.) Lots of people have asked me how to make hats, and last year I published this pattern for ear flap bobble hats. I found that when I returned to it again this year, my sizing was WILDLY off kilter- I mean, HOW big do I think my kids' heads are, exactly? Either that or I actually wrote the wrong stitch on that pattern. My bad, I'm sorry if your toddler hats are enormous and actually fit your granddad instead. Of course, tension, hook and yarn has something to do with it, but if you want that pattern to work I'd suggest switching to htr.
I wanted to give you a guide to creating your own crochet beanie hat pattern, with some helpful hints and ideas from me. This is all written in UK crochet terminology, with the bobble hat pattern in DK yarn. I'm assuming some crocheting ability, but this should help boost your skills if you're a total beginner.
AAANNNNNND bobble hat make great gifts, yes? Certainly this time of year, anyway...
Crocheting flat circles
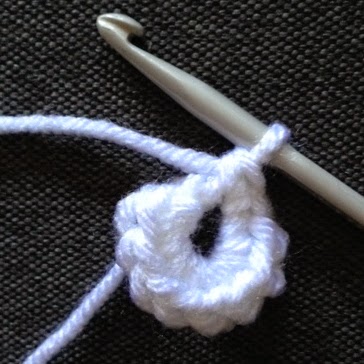
I begin my bobble hat pattern with a flat circle. I think, for hats, it's important to keep drafts out, so to avoid a hole in the epicentre of the hat, I begin with a magic ring. Like so:

that's blurry, sorry.

Here's a lovely video, made by lovely person I accidentally met on a train to London one day. She just so happened to be a knitting journalist. What a job! I'm so jealous. Actually she had left and was training to be a midwife but knitting THE most beautiful shawl when we met.
To make an even, round circle, it's essential to have the right amount of stitches. I always start with 12 in round 1. You can use double crochet (dc)/single crochet, half trebles (htr)/half doubles, or treble crochet (tr)/double crochet. You could even vary the stitch each round for an interesting effect.
If you're not happy making a magic/adjustable circle/loop/ring, then chain 3, join with a ss and work your first 12 stitches into the ring.
Join your first round with a slip stitch (ss) to the first stitch in the round. We'll be working in rounds, dontcha know.
Sizing your Hat
You can be very precise, if you wish, and measure the recipient's head for the circumference of their noggin. Then you need to work out the diameter- just divide the circumference by Pi (3.14 roughly) and you get diameter TADAH! Otherwise just wing it. Phew, that's better. Yes, winging it is the crocheter's friend.
You'll need to work a certain amount of increase rounds to get a decent enough sized disc (diameter-sized!) that will be shaped into a hat. For each round, you'll need to increase by 12 stitches to get an even, neat circle.
So here's a quick recipe/ hat pattern:-
To begin: With yarn A 4 ch, sl st to form a ring, or make a magic circle/loop/adjustable ring
Round 1: 3 ch (counts as 1 tr), 11 tr into ring. Join with sl st to 3 ch. [12 sts]
Round 2: 2 ch (counts a 1 tr), 1tr into first st , (2 tr into next st) 12 times, join with sl st into 2 ch. [24 sts]
Round 3: 2 ch (counts as 1 tr), 1 tr into first st, (1 tr into next st, 2 tr into next) 12 times. 1 tr into last st, join with sl st into 2 ch. [36 sts]
Round 4: 2 ch (counts as 1 tr), 1 tr into first st, (1 tr into each of the next 2 sts, 2 tr into next) 12 times, 1 tr into each of the last 2 sts, join with sl st into 2 ch. [48 sts]
Round 5: 2 ch (counts as 1 tr), 1 tr into first st, (1 tr into each of the next 3 sts, 2 tr into next) 12 times. 1 tr into each of the last 3 sts, join with sl st into 2 ch. [60 sts]
Round 6: 2 ch (counts as 1 tr), 1 tr into first st, (1 tr into each of the next 4 sts, 2 tr into next) 12 times, 1 tr into each of the last 4 sts, join with sl st into 2 ch. [72 sts]
And continue like that! I would say that 5 increase rounds is plenty for a newborn baby hat, 6 for a baby, 7 for a toddler and 8 for a child of around 4-8. Of course you can keep on increasing for an adult hat! 10 increase rounds would be about the right size, so round ten would look something like this:
Round 10: 2ch (counts as 1 tr), 1 tr into first st, (1 tr into each of the next 8 sts, 2tr into next) 12 times, 1 tr into each of the last 8 sts, join with ss to ch-2. [120 sts]
Shaping your Hat:
After this, you simply work as many rounds without increasing as you wish, in order to achieve the bowl-shape for your hat. I would say 8-10 rounds like the following will give you a cosy hat:
ch2 (counts as tr), 1tr into each st around, join with ss into ch-2.
But repeat this round until you're happy with the length.
To change colour at the end of the row, simply work the first part of your stitch in the old colour:

Then drop the old yarn, and prepare your new yarn. Complete the stitch in your new colour. This will make sure you have a neat join with no weird colour blocks where they shouldn't be:

Finishing your Hat
Ribbed cuff:
A cosy ribbed cuff ensures a tight fit and looks marvellous. Here's an easy (cheat's) way to achieve it in crochet. First count the stitches in your hat. Turn the hat upside down and count the 'V's; if you have counted correctly, you should have stitches= 12 x (amount of increase rounds). Yes? Make a note of this. Good. Then let's proceed.
ch 16, Beginning in 2nd chain from your hook, dc (sc) into each ch to end, turn.
Round 2: ch1, 1dc into back loops ONLY (blo) of each st along. Turn.
Repeat row 2 until you have as many rows as stitches in your hat round. Hurrah! Clever, eh? Now join the cuff by placing wrong sides together and slip stitch the cuff to hat, matching each row end of the cuff with a stitch of the bottom of the hat. Sew up the little cuff seam, and turn up!
If you want to make ear flaps, check out the tutorial on my ear flap hat pattern.
Adding a bobble (pom pom) will increase your hat pleasure considerably, as Albie demonstrates here:

And George, well he refuses to wear his hat. End of. This is best I could do. Please don't judge my parenting on his dummy, if you knew the noise that kid makes you would pacify him too. (he is teething canines and it's the only thing that makes him happy).

I have used Stylecraft DK Special (acrylic yarn) for these hats, and used a 3.5mm hook.
Albie's hat is in the following colours:
Walnut
Petrol
Spice
Lime
Parchment
George's Hat is in:
Petrol
Sherbet
Walnut
Silver
Albie's hat is in the following colours:
Walnut
Petrol
Spice
Lime
Parchment
George's Hat is in:
Petrol
Sherbet
Walnut
Silver
So there you have it. A simple, adaptable DK yarn crochet hat in treble crochet.
Merry makings!
xxx
No comments:
Post a Comment
Hello! Thanks for stopping by to read. I've enabled Disqus so if I don't reply to your comment here, please know that I read and treasure every word. Let's stay in touch! I'm also found on Facebook, Twitter and Instagram. Let's be friends.