
Why hello there! Apologies for the absence this week. It's been an incredibly busy one. I've met up with lots of good friends and it's been rather lovely. Today Albie and I bimbled through the park into town to meet my friend Cecilia and her lovely little daughter Olivia. Yesterday evening I cooked moussaka and greek salad for Nikki and Jo, and I also met them for lunch on Tuesday at a canteen. Jo has just returned from four months in South Asia and I've missed her terribly!
On Monday I went to see Helen. It was her birthday last Thursday and I presented her, along with Cath Kidston Stitch! this lovely gift:

A needle case made by my own fair hand! Helen has recently re-discovered her love of embroidery so I thought I'd encourage her needlecraft and she was chuffed to bits with her needle case.
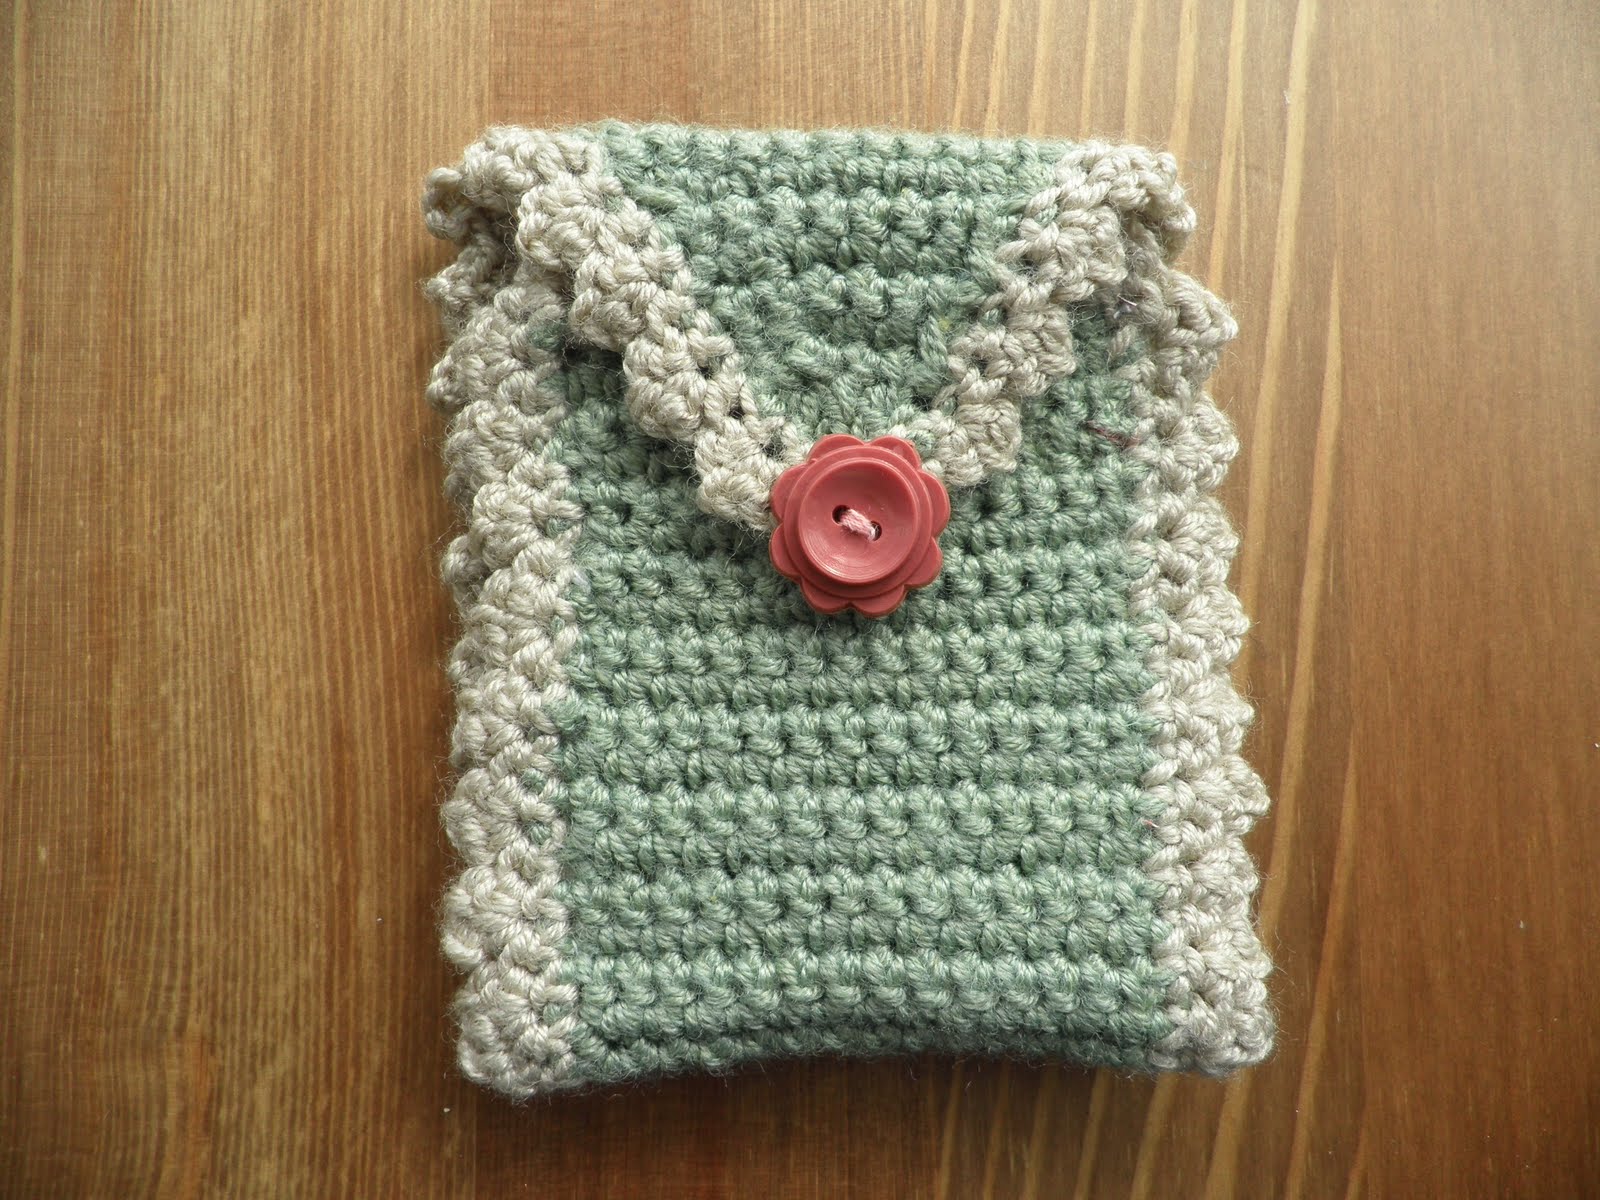
The pattern is VERY simple, and I loved working up this little project. I made up the pattern myself- the first time I have created my own pattern- and I'm very pleased with the results.

The pattern is as follows:-
DK weight cotton/bamboo (Gorgeous DK) on a 3.5 mm hook
- Row 1- ch15 and ch 2 for turning
- Row 2- Double Crochet (DC) in the third ch from the hook (Single crochet[SC] in American terms) then DC into each ch. Turn.
- Row 3- *ch 2 then DC into the second chain from the hook then DC into each stitch.*
- Repeat from * to * for about 50 rows or until the required length for your needles. To create the triangle 'envelope' bit, work one row in DC, then at the beginning and end of each row dc2tog, until you reach the last stitch. Tie off as normal, then tie in the next colour for your border.
- For the edging, simply DC (or SC if american) one round all the way around the edge.
- To create the picot edging, into each stitch *1dc, ch2, 1dc* until you reach the few stitches at the 'point' of the envelope, ch5 across three or so stitches to create the button loop, then continue with * to * until you reach the beginning/end. Tie off then weave the ends in with a tapestry needle.

After I crocheted the long piece, I then stitched on the adorable button, which was purchased at the Vintage Vogue Fair in Brentwood last year. Cute, non? Then I used a piece of Cath Kidston fabric to line the case, which I painstakingly handstitched to ensure neatness. I am not known for my neatness. So I was rather pleased how it turned out!

I will stop by again very soon to share some lovely sunshine moments from the week.
Happy hooking!
This is beautiful! Well done hun I'd've been well chuffed too, love the colours xxx
ReplyDelete